Introduction
We ended Part 2 of this article with commentary of the difficulty of installing a Kevlar tail cord. This final part delves into how its done and touches on the matter of whether or not it is worth the trouble.
Removing the Tailpiece
First, "tie-off" the strings so that they do not unravel on the pegs when loosened. We use a piece of leather boot lace, as shown in the following photos. Remove the tailpiece…in this case the tailpiece is a Wittner polycarbonate with built-in fine tuners, but the idea is the same for any tailpiece.


Remove the existing tail gut from the tailpiece.


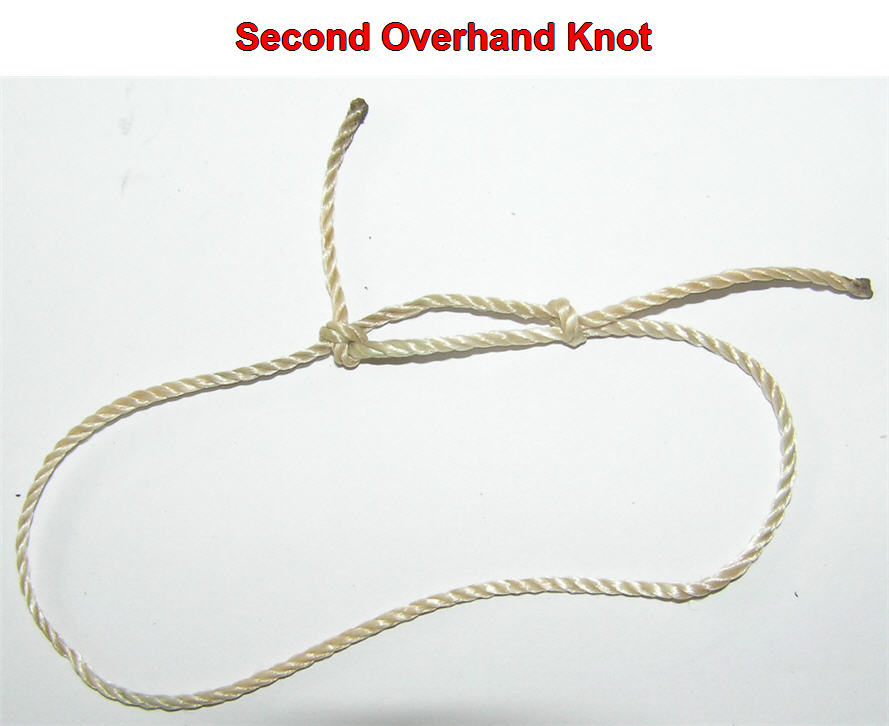
Now the "fun" part: tying the knots.
The following photos illustrate the knotting process with a regular piece of twine in order to make the details more visually clear.


Once the second overhand knot is tied, the cord is pulled so that the two knots come together.
Now let's see it done with a real Kevlar tail cord on the actual tailpiece

")


Re-installing the tailpiece with the new Kevlar tail cord
This process will have to be repeated a number of times until you have the desired adjustment. Untying and re-tying the tail cord is fairly difficult and extremely boring, to be frank.


Remove the leather tie-off strip and bring the strings up to full tension. As the two knots on the tailgut become virtually one, the tailpiece will probably be too close to the bridge. Repeat the whole process of removing the tailpiece and untying the the knots (this will seem impossible at first, but it can and must be done) and re-tying them and go for another try. If you are lucky, you will only have to do this once.
Is it all worth the trouble?
When you are done you will have an extremely resonant tailpiece with a resonant an essentially unstretchable tail gut.
If you have a metal-strung fiddle with a low bridge that was previously not a sonorous as you would have desired, the improvement in depth and power will be dramatic. If you are an experienced "maker" with a lot of patience AND you can set a sound post correctly (the sound post often comes dislodged when the strings are off), you may want to try installing a Kevlar tail cord yourself. In most instances, however, our admonition is the same as Jamie Hyneman and Adam Savage ("The Mythbusters"), "Do NOT try this at home…EVER!"
If you do decide to have a Kevlar tail gut professionally installed, make sure that the luthier has experience with tied tail guts. Having us do it for you is always an option of last resort. With instrument, shipping, insurance and the actual work of installing the Kevlar tail cord, it will cost you about $150.
If you buy an instrument from Don Rickert Lutherie, it will have a Kevlar tail cord unless you specify otherwise.
So there you have it.

Leave a comment